Chapter 1

Linux

Subsections of Linux

Fedora Desktop Setup

When you first download Fedora Workstation, it’s going to be a little hard to figure out how to make it usable. Especially if you’ve never tinkered with Linux before.

Here is how to set up Fedora.

Add badname user

$ adduser --badname firstname.lastname $ sudo usermod -aG wheel username

# uncomment this line in the visudo file 
$ sudo visudo
%wheel ALL=(ALL) ALL

Delete other user:

$ userdel username

DNF Config (for speed)

DNF is one of the package managers that comes with Fedora. You use it to install most software and applications.

The official doc is Here Just open up your DNF config file with your favorite text editor.

sudo nano /etc/dnf/dnf.conf

Then add the following:

fastestmirror=True  
max_parallel_downloads=10  
defaultyes=True  
keepcache=True

Clear cache (do this occasionally)

sudo dnf clean dbcache or sudo dnf cleanall

Update DNF

sudo dnf -y update

DNF commands

https://docs.fedoraproject.org/en-US/fedora/latest/system-administrators-guide/package-management/DNF/

RPM Fusion

More accessibility to various software packages.

https://rpmfusion.org/

Fedora with dnf:

sudo dnf -y install https://mirrors.rpmfusion.org/free/fedora/rpmfusion-free-release-$(rpm -E %fedora).noarch.rpm https://mirrors.rpmfusion.org/nonfree/fedora/rpmfusion-nonfree-release-$(rpm -E %fedora).noarch.rpm

AppStream metadata

to enable users to install packages using Gnome Software/KDE Discover

sudo dnf -y groupupdate core

flatpak

lhttps://flatpak.org/setup/Fedora

flatpak remote-add --if-not-exists flathub https://flathub.org/repo/flathub.flatpakrepo

set a hostname

sudo hostnamectl set-hostname "New_Custom_Name" this will show after next reboot

Make it yours

in the software center

gnome tweaks

add minimize and maximize

extentions (by gnome) (green puzzle piece)

Add a Dock

https://extensions.gnome.org/extension/307/dash-to-dock/

Window is Ready - Notification Remover

https://extensions.gnome.org/extension/1007/window-is-ready-notification-remover/

Vitals

https://extensions.gnome.org/extension/1460/vitals/

Arch Menu

https://extensions.gnome.org/extension/3628/arcmenu/

Dash to Panel

https://extensions.gnome.org/extension/1160/dash-to-panel/

Screenshot tool

https://extensions.gnome.org/extension/1112/screenshot-tool/

ran gnome-screenshot tool in command prompt and it asked to install

l2tp VPN

sudo dnf install xl2tpd

sudo dnf install NetworkManager-l2tp

sudo dnf install NetworkManager-l2tp-gnome

service NetworkManager restart

Airpods not pairing Issue

remove from the pairing list, force them in pairing mode and pair them back.

This can be made easy with bluetoothctl.

1/ Just in case, restart the bluetooth service:

$ sudo systemctl restart bluetooth
$ systemctl status bluetooth 

2/ bluetoothctl is easier than the UI imo

$ bluetoothctl
[bluetooth] $ devices
Device 42:42:42:42:42:42 My AirPods <-- grab the name here
[bluetooth] $ remove 42:42:42:42:42:42 

Now, make sure your airpods are in the charging case, close the lid, wait 15 seconds, then open the lid. Press and hold the setup button on the case for up to 10 seconds. The status light should flash white, which means that your AirPods are ready to connect

3/ Pair them back

[bluetooth] $ pair 42:42:42:42:42:42 <--- add the same device from earlier 

Enable Fractional Scaling

This lets you change display scaling in smaller increments. Make sure Wayland is turned on >

run: gsettings set org.gnome.mutter experimental-features "['scale-monitor-framebuffer']"

then Reboot

Install gimp

$ sudo dnf install gimp enable in screenshot tool after install for gimp {f}

Install Arrows https://graphicdesign.stackexchange.com/questions/44797/how-do-i-insert-arrows-into-a-picture-in-gimp

Go to your home folder
Go to .config/GIMP
Go to the folder with a version number (2.10 for me)
Go to scripts
Download the arrow.scm file and place it here. Don't forget to unzip.
Open GIMP and draw a path

From Tools menu, select Arrow

= h.265 main 10 profile media codec error =

Keypassxc

sudo dnf install snapd
sudo ln -s /var/lib/snapd/snap /snap
sudo snap install keepassxc

Install Obsidian using Flatpak

  1. In your terminal, run the following command to install Obsidian:

    flatpak install flathub.obsidian.Obsidian
  2. Open Obsidian by running the following command:

    flatpak run.obsidian.Obsidian

Distrobox

See distrobox

ZSH For Humans

GitHub - romkatv/zsh4humans: A turnkey configuration for Zsh

Install Starcraft on Fedora

https://www.youtube.com/watch?v=eefsL9K2w4k

Starcraft 2 install on Fedora Workstation 38

Install your latest gpu driver https://github.com/lutris/docs/blob/master/InstallingDrivers.md

I am just running off of built in AMD graphics. So we just need to install support for Vulkan API sudo dnf install vulkan-loader vulkan-loader.i686

Install Wine $ sudo dnf -y install wine

Install Lutris Install the Flatpak version in software center.

Fedora Hotkeys

Terminal

Close Terminal shift + c + q

Previous Tab c + Page Up

Next Tab c + Page Down

Move to Specific Tab Alt + #

Full Screen F11

New Window Shift + Ctrl + t

Close Tab Shift + Ctrl + w

Desktop

Run a command super + F2

Switch Between Applications Alt + Esc

Move Window to Left Monitor Shift + Super + <-

Move Window to Right Monitor Shift + Super + ->

Minimize Current Window Super + H

Close Current Appllication Ctrl + Q

Browser

Firefox

Switch Between Tabs Ctrl + Tab

Switch Between Tabs in Reverse Ctrl + Shift + Tab

Detach Tab Extension

https://addons.mozilla.org/en-US/firefox/addon/detach-tab/

Detach Tab Ctrl _ Shift _ Space

Reattach Tab Ctrl + Shift + v

RHCSA Lab Using Vagrant

RHCSA Vagrant Lab RHCSA Vagrant Lab

We are going to use Vagrant to set up two RHEL 8 servers with some custom configuration options. I will include some helpful Vagrant commands at the end if you get stuck.

In this guide, I will be using Fedora 38 as my main operating system. I use Fedora because it is similar in features to Red Hat Linux Distributions. This will give me even more practice for the RHCSA exam as I use it in day-to-day operations.

Note, if you are using Windows, you will need to install ssh. This can be done by installing Git. Which automatically installs ssh for you.

You will also need to have the latest version of Virtualbox installed.

Here are the steps:

  1. Download and install Vagrant
  2. Make a new directory for your vagrant lab to live in
  3. Add the vagrant box
  4. Install the Vagrant disk size plugin
  5. Initialize the Vagrant box and Edit the Vagrant file
  6. Bring up the Vagrant box

1. Download and install Vagrant.

In Fedora, this is very easy. Run the following command to download and install Vagrant:

sudo dnf install vagrant

2. Make a new directory for your vagrant lab to live in.

Make your vagrant directory and make it your current working directory:

cd Vagrant
  1. Add the Vagrant box. vagrant box add generic/rhel8

  2. Install the Vagrant disk size plugin. The disk size program will help us set up custom storage sizes. Since we will be re-partitioning storage, this is a useful feature.

vagrant plugin install vagrant-disksize

  1. Initialize the Vagrant box and edit the Vagrant file. First, initialize the Vagrant box in the vagrant directory:

vagrant init generic/rhel8

After completion, there will now be a file called “Vagrantfile” in your current directory. Since Vim is on the RHCSA exam, it’s wise to practice with it whenever you can. So let’s open the file in Vim:

vim Vagrantfile

You will see a bunch of lines commented out, and a few lines without comments. Go ahead and comment out everything and paste this at the end of the file:

Vagrant.configure("2") do |config


config.vm.box = "generic/rhel8"


config.vm.define "server1" do |server1|


server1.vm.hostname = "server1.example.com"


server1.vm.network "private_network", ip: "192.168.2.110"


config.disksize.size = '10GB'


end


config.vm.define "server2" do |server2|


server2.vm.hostname = "server2.example.com"


server2.vm.network "private_network", ip: "192.168.2.120"


config.disksize.size = '16GB'


end


config.vm.provider "virtualbox" do |vb|


vb.memory = "2048"


end


end|

The configuration file is fairly self-explanatory. Save Vagrantfile and exit Vim. Then, create /etc/vbox/networks.conf and add the following:

* 10.0.0.0/8 192.168.0.0/1
* 2001::/646

This will allow you to be more flexible with what network addresses can be used in VirtualBox.

Bring up the Vagrant box.

Now, we bring up the Vagrant box. This will open two Virtual machines in Virtualbox named server1 and server2 in headless mode (there is no GUI).

vagrant up

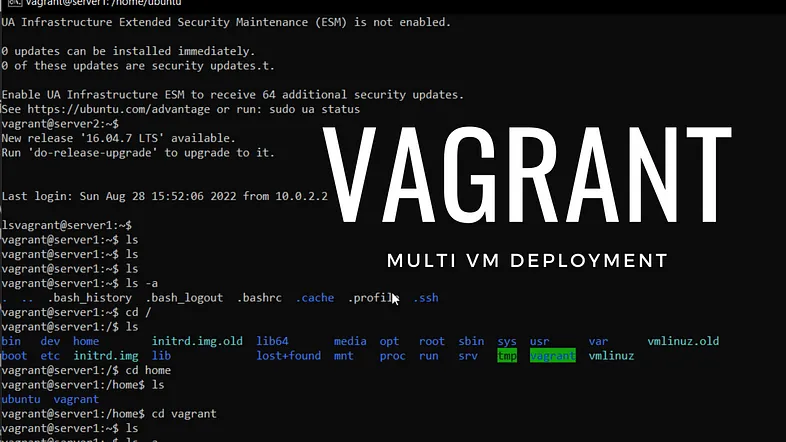
Great! Now we can use Vagrant to ssh into server1:

vagrant ssh server 1

From server1 ssh into server2 using its IP address:

[vagrant@server1 ~]$ ssh 192.168.2.120

Now you are in and ready to stir things up. The last thing you need is some commands to manage your Vagrant machines.

Helpful Vagrant commands.

Shut down Vagrant machines:

vagrant halt Suspend or resume a machine:

vagrant suspend
vagrand resume

Restart a virtual machine:

vagrant reload

Destroy a Vagrant machine:

vagrant destroy [machine-name]

Show running VMs:

vagrant status

List other Vagrant options:

vagrant

If you are going for RHCSA, there is no doubt that you will also use Vagrant sometime in the future. And as you can see, it’s pretty quick and simple to get started.

Feel free to reach out with questions.

RHCSA Notes

RHCSA Red Hat Enterprise Linux 8 (UPDATED) RHCSA Red Hat Enterprise Linux 8 (UPDATED)RHCSA Red Hat Enterprise Linux 8 (UPDATED) - Asghar Ghori

Here are my notes from Asghar Gori’s RHCSA book. Buy the book or read the reviews here.